Last Updated on June 28, 2026 by Eric B. Steele
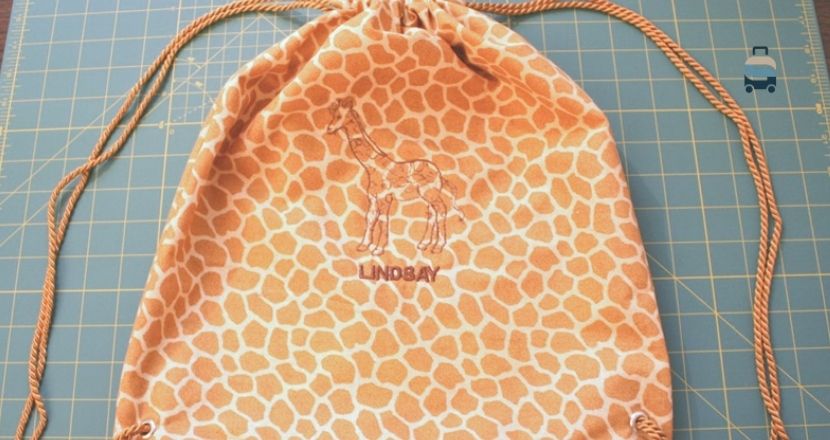
Are you looking for a simple, stylish, and practical bag you can make yourself? A drawstring backpack is the perfect project for you.
It’s easy to create, customizable to your taste, and great for carrying your daily essentials. Imagine having a bag that fits your style and needs perfectly—without spending a fortune. In this guide, you’ll discover step-by-step how to make your own drawstring backpack, even if you’ve never sewn before.
Ready to turn fabric into your new favorite accessory? Let’s get started!
Materials Needed
Making a drawstring backpack is a simple and fun project. You need some basic materials to start sewing your bag.
These materials help you create a strong and useful backpack. Let’s look at what you need.
Fabric
Choose a fabric that is strong and easy to clean. Cotton, canvas, or nylon work well for backpacks.
The fabric should be thick enough to hold items but light enough to carry.
Drawstring Cord
The drawstring cord closes and carries the backpack. Use nylon or cotton cord that is sturdy and smooth.
The length of the cord depends on the size of your backpack and your comfort.
Thread
Pick a thread color that matches or contrasts with your fabric. Use strong polyester thread for durability.
Good thread keeps your backpack seams secure and long-lasting.
Sewing Tools
You need a sewing machine or needle for hand sewing. Scissors, pins, and a measuring tape are also useful.
- Sewing machine or hand needle
- Fabric scissors
- Pins or clips
- Measuring tape or ruler
Optional: Fabric Liner Or Pocket
You can add a fabric liner inside the backpack for extra strength. Small pockets help organize items.
Choose a lighter fabric for the liner and pockets to keep the backpack light.

Credit: www.youtube.com
Cutting The Fabric
Creating a drawstring backpack starts with cutting the fabric. This step is crucial for ensuring your backpack is the right size and shape.
Follow these guidelines to cut your fabric accurately and efficiently. Gather your materials and prepare your workspace for a smooth process.
Gather Your Materials
Before you start cutting, make sure you have all the necessary materials. This will make the process easier and faster.
- Fabric scissors
- Measuring tape
- Chalk or fabric marker
- Ruler
- Fabric
Measure And Mark The Fabric
Start by measuring and marking your fabric. Accurate measurements ensure your backpack will be the right size.
Use a measuring tape to mark a rectangle of 18 inches by 20 inches on your fabric.
Cut The Fabric
Once your fabric is marked, it’s time to cut. Be careful and use sharp scissors for clean cuts.
| Action | Tool |
| Cut along the marked lines | Fabric scissors |
| Ensure straight edges | Ruler |
Prepare For Sewing
With the fabric cut, you are now ready to move to the next step in making your drawstring backpack. Keep your workspace tidy and organized.
Sewing The Backpack
Sewing a drawstring backpack is a fun and easy project. You will need basic sewing skills and a few materials. This guide helps you make a simple backpack step-by-step.
We will focus on how to sew the fabric pieces together and add the drawstring. Follow the instructions carefully to get a neat and sturdy backpack.
Preparing The Fabric
Start by cutting your fabric into the right shapes. You need two rectangles for the main bag. Make sure the edges are even and straight. Iron the fabric to remove wrinkles.
Sewing The Main Body
Place the two fabric rectangles with the right sides facing each other. Pin the edges to hold them in place. Sew along the sides and bottom, leaving the top open for the drawstring channel.
- Align fabric pieces with right sides together
- Pin the left, right, and bottom edges
- Sew using a straight stitch with ½ inch seam allowance
- Backstitch at the start and end for strength
- Leave the top edge open
Creating The Drawstring Channel
Fold the top edge of the bag down about 1 inch to the inside. Pin it in place. Sew close to the folded edge to create a channel for the drawstring. Leave a small opening to insert the string later.
Use a safety pin to guide the drawstring through the channel. Make sure the string goes all the way around and comes out both ends. Tie knots at the ends to stop the string from slipping back.
| Material | Recommended Size | Notes |
| Fabric | 18 x 14 inches (2 pieces) | Light to medium weight cotton |
| Thread | Standard spool | Strong polyester thread |
| Drawstring | About 40 inches | Cord or ribbon |

Credit: www.youtube.com
Adding The Drawstring
Adding the drawstring is a key step in making your backpack functional. The drawstring allows the bag to open and close easily.
This part needs careful threading and securing to ensure the backpack is strong and comfortable to wear.
Preparing The Drawstring Channels
Start by folding the top edge of the backpack down to create a channel for the drawstring. Sew the folded edge firmly to hold the channel in place.
Threading The Drawstring
Use a safety pin or a bodkin to help guide the drawstring through the channels. Make sure the drawstring goes all the way around the bag’s top edge.
- Attach a safety pin to one end of the drawstring.
- Push the pin through the channel opening.
- Feed the drawstring all around until it returns to the start point.
- Pull both ends of the drawstring out evenly.
Securing The Drawstring Ends
Once threaded, tie knots at each end of the drawstring to stop it from slipping back through the channel. You can also add plastic tips or fabric covers.
| Drawstring End | Purpose |
| Knot | Keeps drawstring from slipping |
| Plastic Tip | Prevents fraying |
| Fabric Cover | Improves grip and look |

Credit: www.youtube.com
Frequently Asked Questions
What Materials Do I Need To Make A Drawstring Backpack?
You need fabric, drawstrings, scissors, a sewing machine or needle, and thread.
How Do I Measure Fabric For A Drawstring Backpack?
Cut two pieces of fabric, about 16 by 18 inches each, for the bag.
Can I Use Any Fabric For A Drawstring Backpack?
Cotton or polyester works best. Avoid stretchy or thin fabrics.
How Do I Sew The Drawstring Bag Seams?
Place fabrics right sides together, sew three sides, leave the top open.
How To Add Drawstrings To The Backpack?
Fold the top edge, sew a channel, then thread the strings through.
How Long Does It Take To Make A Drawstring Backpack?
It usually takes 30 to 60 minutes, depending on your sewing skill.
Conclusion
Making a drawstring backpack is simple and fun. Choose your fabric and cut it to size. Sew the edges carefully and add the drawstrings. This project saves money and lets you create your own style. Carry your backpack with pride anywhere you go.
Try different colors and patterns next time. Enjoy the process and show off your handmade bag.